How Did You Use New Media Technologies In The Construction & Research, Planning & Evaluation Stages?
Weebly
|
|

|
We used the Weebly website editor to produce an online portfolio of our work due to its ease of use and feature-rich online editor. For free, we were able to create a website that was hosted for us as well as having a .com domain for free. This took the stress of hosting a website off of us and allowed us to focus on creating a complete promotional package instead. However, for an additional cost users are able to purchase 'premium' upgrades which provide additional tools and features which prove useful in certain scenarios that may range in complexity.
In order to setup a Weebly website, we first needed to create an account. On Weebly, all websites you produce are linked to an account so it is important that we created one which all of the team could access. Once we had created an account and logged into the dashboard, we were presented with the ability to create a website. After creating it, the dashboard acts as a place where we could review the popularity of our website using the analytics that were provided. Statistics such as users and unique visitors are displayed on the immediate display on the dashboard which would be useful for evaluating the popularity of a new product release in the media industry.
After selecting our website and entering the editor, we were presented with a series of tools which presented us with the ability to construct our website and add elements to our portfolio. At the top of the editor, we were able to cycle between building each page, modifying the list of pages, changing the style (theme) of our site and adding additional apps which introduced elements to our website which separated it from others.
By combining each of the tools available in Weebly, we were able to create a professional looking website which we used to represent Pentagram Pictures. Using Weebly we have been able to produce a location where our complete promotion package can be displayed for visitors to view. Furthermore, the use of Weebly has helped us to place a variety of multimedia onto a website by adding our trailer, magazine cover and movie poster alongside any other additional content which we created.
Final Cut Pro X
|
|
As well as using Weebly to produce a website, we also utilised Apple's Final Cut Pro X suite to produce our trailer. We chose Final Cut Pro due to its speed, easy to use Graphical User Interface and powerful range of tools available to manipulate the footage that we captured.
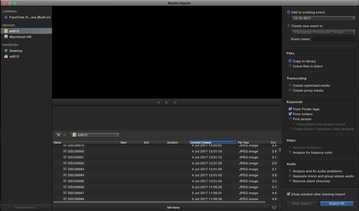
During the creation of our trailer and other videos we utilised a variety of tools available for our usage in Final Cut Pro X. Before we could edit our trailer, we needed to import and archive our footage. We used Final Cut Pro's import tool to add media to our library as well as creating an archive on an external drive to ensure that we do not loose any footage that is valuable to us. After doing so, we were able to insert footage onto our timeline and edit it further simply by dragging it or using the 'IOE' shortcut combination.
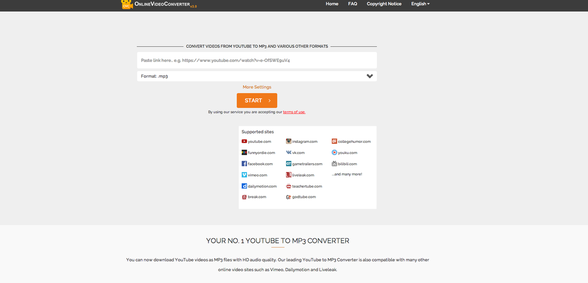
However, not only did we use media that we captured and created but also external media created by others that we wished to use in ours. After finding content on YouTube, we used a converter in order to download the audio contents of a video as an MP3 audio file which we could later import into Final Cut Pro for further editing. We used the website 'onlinevideoconverter.com' to insert a video link, extract the audio and then download it.
In order to give our footage a cinematic look, we used the colour correction tool. We chose to highlight a series of dark blues and reds in order to give our footage a sinister look which would convey the theme that we had conceptualised fully.
One of the most important tools which we used in Final Cut was the text tool. Using the 'T' tool, text can be inserted onto the timeline either as a plain format for manual modification or using a series of templates and presets provided by Apple. We inserted a series of 2D text onto our timeline to display pieces of information related to our trailer that we then manipulated by editing properties such as the font, style, size, rotation and position.
Using the combination of tools available in Final Cut Pro has allowed us to produce a professional looking media product which we would not have been able to create without the power of Final Cut.
During the creation of our trailer and other videos we utilised a variety of tools available for our usage in Final Cut Pro X. Before we could edit our trailer, we needed to import and archive our footage. We used Final Cut Pro's import tool to add media to our library as well as creating an archive on an external drive to ensure that we do not loose any footage that is valuable to us. After doing so, we were able to insert footage onto our timeline and edit it further simply by dragging it or using the 'IOE' shortcut combination.
However, not only did we use media that we captured and created but also external media created by others that we wished to use in ours. After finding content on YouTube, we used a converter in order to download the audio contents of a video as an MP3 audio file which we could later import into Final Cut Pro for further editing. We used the website 'onlinevideoconverter.com' to insert a video link, extract the audio and then download it.
In order to give our footage a cinematic look, we used the colour correction tool. We chose to highlight a series of dark blues and reds in order to give our footage a sinister look which would convey the theme that we had conceptualised fully.
One of the most important tools which we used in Final Cut was the text tool. Using the 'T' tool, text can be inserted onto the timeline either as a plain format for manual modification or using a series of templates and presets provided by Apple. We inserted a series of 2D text onto our timeline to display pieces of information related to our trailer that we then manipulated by editing properties such as the font, style, size, rotation and position.
Using the combination of tools available in Final Cut Pro has allowed us to produce a professional looking media product which we would not have been able to create without the power of Final Cut.
Photoshop
|
|
On top of using Final Cut Pro X to produce our trailer and Weebly to create an online portfolio of our work, we also used Adobe Photoshop. After researching our options, we found that Photoshop was the industry standard in photo manipulation and editing and therefore knew that it would be perfect for us. Using a variety of techniques and tools, we were able to produce a professional looking poster and magazine cover which could be used to promote our film 'Muse'.
As a starting point, we needed to create a blank canvas to use for the basis of our poster. We set the dimensions to 39.59cm x 22.24cm in order to ensure that we would meet the industry standard for film posters and that we also had enough space to add content and manipulate our photo without reducing the quality of it and limiting the potential of it being used as an advertisement.
After creating a blank canvas, we needed to import the images which we used for our magazine cover and poster. We used the 'open' tool to open the MacOS file manager and browse for the images which we created and imported to our workstation. Once imported onto the canvas, we could begin manipulating our image as well as inserting other elements which when combined together would form our film poster and magazine cover.
One tool which we utilised often during the creation of our film poster and magazine cover was the transform tool. Instead of needing to adjust the properties manually (although Photoshop allows for this still when more control is required) we used the transform tool to automatically and visually adjust the dimensions of each object inserted onto our canvas. For example, we used it to scale the image of our lead character onto the canvas by simply dragging each corner until it filled the canvas completely. Using this both saved us time and also streamlined the process of learning to use Photoshop.
As well as using the transform tool, we also utilised the text tool in order to insert various pieces of text onto our film poster and magazine cover, select text once inserted and also to adjust properties such as font colour, size and the font itself.
When layering various elements on top of each other in Photoshop, it was important that we were able to blend them effectively so that the final image would look complete and that each element would fit with each other. After selecting a layer, we used the blending options such as 'dissolve' - which edits each pixel in a layer to equal a result colour - and 'screen' - which inverses the colours in a layer.
QuickTime Player
|
In order to create the series of videos which we used in this evaluation question we utilised Apple's QuickTime Player to capture a set of screen recordings. Due to being built into Apple's computers, QuickTime was easy to access and easy to use. Using it, we were able to record our screen as well as audio at the same time which we later imported into Final Cut Pro X for further editing. During each recording, we demonstrated the various techniques and tools which were used to create our complete promotional package
Importing our screen recordings into Final Cut Pro X was simple due to the file which QuickTime creates. Thanks to both being in-house proprietary Apple software, the created file could easily be imported for editing in Final Cut. |

|
Sony DSLR
|
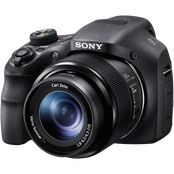
After researching the different options which we could use for our camera, we opted with a Sony DSLR after finding that they were one of the market leaders in visual technology. We used a DSLR due to the high quality that it provided and widely-compatible format that it recorded in - allowing us to import our footage straight into Final Cut Pro X and Adobe Photoshop for editing our trailer, magazine cover and poster.
|
Apple iMac
|
As we had already established that Final Cut Pro X was the best option for us to use to edit our trailer, we also required an Apple computer as Final Cut is an exclusive. After researching our various options we opted with an iMac due to its balance of price to performance and ease-of-use which would be essential when developing the skills and knowledge required to edit our trailer.
Using a powerful computer such as an iMac was also important for ensuring that we had access to software used such as Weebly, Prezzi and Microsoft Word which was used to produce our portfolio, presentation documents and our production planning documents. |

|
Software Used

|

|
